
How to Make Homemade Bath Salts for Relaxation and Skin Care
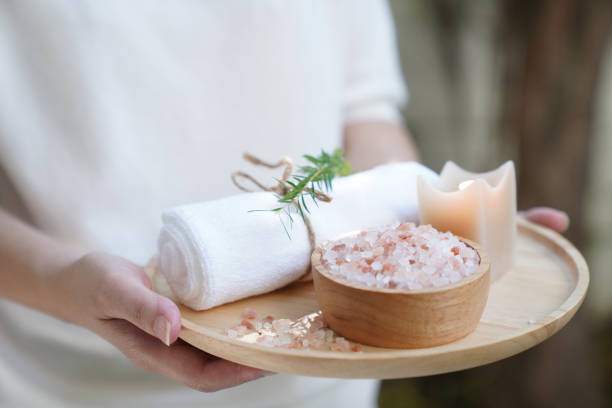
Bath salts are a simple yet luxurious addition to your bath routine, offering benefits such as muscle relaxation, softening skin, and adding a soothing fragrance to your bath. While store-bought options exist, learning how to make homemade bath salts allows you to customize blends tailored to your preferences.
Whether you’re looking to soothe sore muscles, reduce inflammation, or simply enjoy a calming soak, creating your own bath salts is both affordable and easy.
In this article, we’ll take you through the process of making bath salts at home, using natural ingredients and essential oils for fragrance.
This guide will help you create a therapeutic bath salt mix, perfect for personal use or as thoughtful homemade gifts.

Materials You’ll Need for Homemade Bath Salts
To make your own bath salts, gather the following ingredients and materials:
- Coarse sea salt: Provides essential minerals that soften skin and relax muscles.
- Epsom salts: Known for its ability to relieve muscle tension and reduce inflammation.
- Baking soda: Softens water and soothes irritated skin.
- Essential oils: These oils add fragrance and additional benefits depending on your choice (e.g., lavender for relaxation, eucalyptus for muscle relief).
- Food coloring: Optional, but adds a beautiful visual element to your bath salts.
- Bath salt labels and containers: If you’re gifting the bath salts, a labeled container adds a personal touch.

Benefits of Homemade Bath Salts
There’s a wide range of benefits when you create your own bath salts, both in terms of health and customization. Here’s why you should consider this easy DIY project:
1. Relaxing Sore Muscles
One of the primary benefits of Epsom salts is their ability to relax tired and sore muscles. Epsom salts contain magnesium sulfate, which helps to reduce muscle inflammation and improve recovery after a long day.
2. Softening and Moisturizing Skin
Sea salt is packed with minerals that nourish and soften your skin. Combined with baking soda, your bath becomes a gentle exfoliating experience that leaves your skin smooth and hydrated.
3. Aromatherapy
By adding essential oils to your homemade bath salts, you can create a customized aromatherapy experience. For example, lavender essential oil helps reduce stress, while peppermint oil offers an invigorating, energizing effect.
4. Detoxification
Bathing with salt blends can help draw out toxins from the body. Both Epsom salts and sea salt encourage the removal of harmful substances, leaving you feeling refreshed and revitalized.
Step-by-Step Guide to Make Homemade Bath Salts
Now that you know the benefits of making bath salts at home, let’s go through the simple steps to create your own personalized blend.
Step 1: Combine Your Salt Base
The key to bath salts is the salt blend itself. In a large mixing bowl, you’ll want to combine:
- 6 parts coarse sea salt: This will act as the base for your mix, providing essential minerals.
- 3 parts Epsom salts: This will help soothe tired muscles and reduce inflammation.
- 1 part baking soda: This ingredient softens the water and helps alleviate skin irritation.
For example, if you use 6 cups of sea salt, add 3 cups of Epsom salts and 1 cup of baking soda. Stir these ingredients well to ensure they are evenly distributed.
Step 2: Add Essential Oils
Once your salt base is mixed, it’s time to add your desired scent. Choose essential oils based on the mood you want to create.
For a relaxing bath, try lavender or chamomile. For a more invigorating experience, consider eucalyptus or peppermint.
Add a few drops of essential oils to your salt blend, and stir thoroughly. You’ll want the fragrance to be evenly dispersed throughout the mixture.
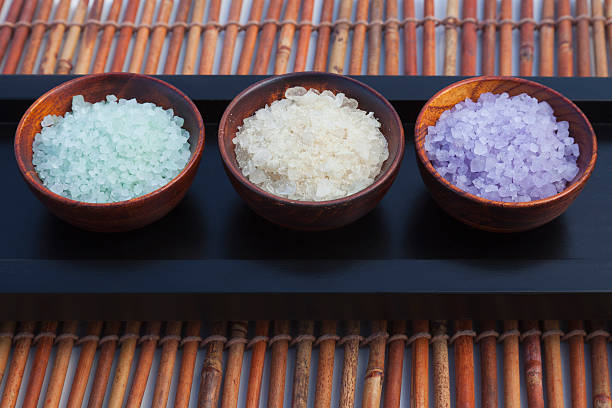
Step 3: Add Color (Optional)
While not necessary, adding food coloring can give your bath salts a more aesthetically pleasing look.
Opt for natural food colorings to keep your salts as chemical-free as possible. Start with a few drops and mix well. If you want a more vibrant shade, add more drops until you reach your desired color.
Step 4: Store Your Bath Salts
If you’re planning on using your homemade bath salts immediately, you can store them in any airtight container.
However, if you’re making these as gifts, consider decorative jars with lids. Label your containers with a cute tag or sticker that lists the ingredients and their benefits.

Popular Essential Oil Blends for Homemade Bath Salts
Choosing the right essential oils for your bath salts is key to creating the perfect mood and therapeutic experience. Here are some popular blends to consider:
- Relaxation Blend: Lavender, chamomile, and ylang-ylang
- Energizing Blend: Peppermint, rosemary, and eucalyptus
- Detox Blend: Tea tree oil, lemon, and juniper berry
- Mood-Boosting Blend: Orange, geranium, and bergamot
Experiment with these blends to find one that suits your needs, or create your own combination of oils to tailor your bath salts even further.
How to Use Homemade Bath Salts
Now that your bath salts are ready, the only thing left is to enjoy them! To use, simply add ½ to 1 cup of bath salts to your bathwater as it fills the tub.
For best results, let the salts dissolve fully before stepping into the water. The Epsom salts will relax your muscles, while the sea salt and baking soda soften your skin.
For an added touch of luxury, sprinkle some fresh rose petals or dried lavender into the bathwater.
Tips for Customizing Your Homemade Bath Salts
Here are a few extra tips to enhance your bath salt-making experience:
- Add Dried Herbs or Flowers: Dried lavender, rose petals, or chamomile flowers make a beautiful addition to your bath salts. These also enhance the aromatherapy experience.
- Experiment with Different Salts: While coarse sea salt is commonly used, Himalayan pink salt or Dead Sea salt can also be excellent alternatives.
- Use Carrier Oils: If you want to add an extra moisturizing boost, add a tablespoon of carrier oil (like coconut oil or sweet almond oil) to your mixture. Be cautious though, as oil can make the bathtub slippery!
Homemade Bath Salts: An Affordable Luxury
Making your own bath salts not only allows for full control over ingredients but also saves money.
The cost of making bath salts at home is significantly lower than purchasing pre-made blends, and the process can be therapeutic in itself.
Whether you’re looking to relax, rejuvenate, or detox, homemade bath salts are a simple yet luxurious way to elevate your bath experience.

Frequently Asked Questions (FAQs)
What is the shelf life of homemade bath salts?
Bath salts typically last for about 6 months if stored in an airtight container away from moisture.
Can I use table salt instead of sea salt?
While it’s possible, sea salt contains more minerals that are beneficial for your skin.
How much essential oil should I add to my bath salts?
Typically, 10-15 drops of essential oil are enough for a small batch of bath salts. Adjust based on personal preference.
Are bath salts safe for sensitive skin?
Yes, but be sure to avoid essential oils that may irritate sensitive skin. Test a small patch before full use.
Can I add oils to my bath salts?
Yes, adding carrier oils like coconut or jojoba can provide extra hydration, but use sparingly.
References: